To create RSVPs scroll down to the Tickets meta box.
Here you will see a button that says + New RSVP, you’ll also see the + New Ticket button (as shown below).

The RSVP Ticket Fields
Clicking the + New RSVP button will open the Add New RSVP fields.
At this point you can then fill out the fields and click “Save RSVP”.
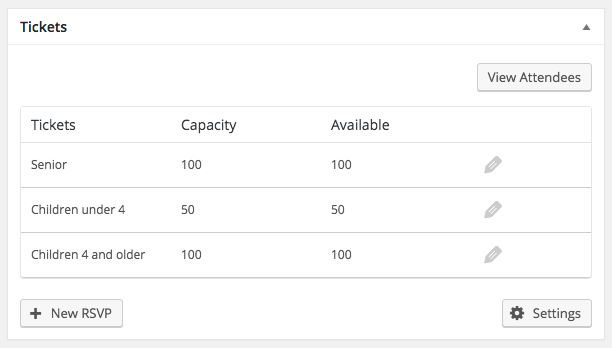
You can add multiple RSVP options to your event, for example,you might want to have different kinds of RSVP for attendees to select (Senior, Children, Students, General, Etc.).
Below you see a screenshot showing multiple RSVP tickets.
Below you'll find an image showing the various fields for RSVPs.
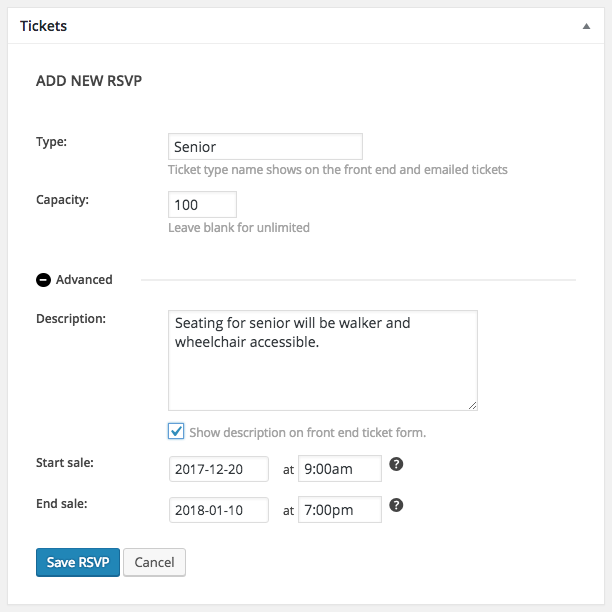
The fields in the tickets meta box are fairly self-explanatory, but we'll run through each just to be sure.
- Type: This lets you set a unique name for the ticket type – which might be something like Member, Student, Partner, etc.
- Capacity: This is the number of tickets that are available: if you leave this blank the capacity will be set to unlimited. You should set this number accordingly if you have a limited number of seats for your event.
Advanced fields:
- Description: This area allows you to add any information attendees might be interested in, such as bring your portfolio or members only event.
- Start sale: This setting sets when the RSVP becomes available.
- End sale: This setting allows you to set a date after which users will not be able to RSVP.
You will also notice an option for collecting attendee information.
This area allows you to request addition information beyond the name and email of the person submitting the RSVP. You can learn about this by reviewing the Collecting Additional Attendee Information Article.
Accepting RSVPs
Now that you have created your RSVP tickets, you can now publish your event and let people RSVP. Just scroll up to the Publish pane on the right side of the page, click Publish or Update, and you are good to go!
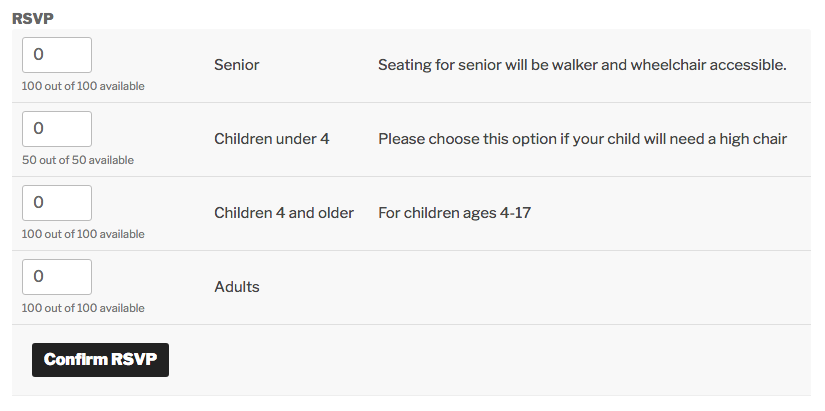
After you've published (and depending on your chosen “Start Sale Date” option for your RSVP tickets), users will see something like this at the bottom of your ticketed event.
That's all there is to it!